Bread and Breakfast
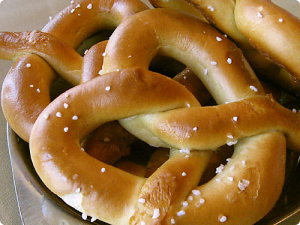
Soft ‘n Chewy Pretzels
|
Recipes:
|
1
|
2
|
3
|
4
|
5
|
6
|
|
Servings:
|
12
|
24
|
36
|
48
|
60
|
72
|
|
Makes:
|
12
|
24
|
36
|
48
|
60
|
72
|
|
Ingredients:
|
|
|
|
|
|
|
|
Warm water
|
1 C.
|
2 C.
|
3 C.
|
4 C.
|
5 C.
|
6 C.
|
|
Active dry yeast
|
1 env.
|
2 env.
|
3 env.
|
4 env.
|
5 env.
|
6 env.
|
|
Flour
|
1-1/2 C.
|
3 C.
|
4-1/2 C.
|
6 C.
|
7-1/2 C.
|
9 C.
|
|
Butter or margarine, softened*
|
2 T.
|
4 T.
|
6 T.
|
8 T.
|
10 T.
|
12 T.
|
|
Salt
|
1/2 t.
|
1 t.
|
1-1/2 t.
|
2 t.
|
2-1/2 t.
|
1 T.
|
|
Sugar
|
1 T.
|
2 T.
|
3 T.
|
1/4 C.
|
1/4 C. + 1 T.
|
1/4 C. + 2 T.
|
|
Flour
|
1-1/4 C.
|
2-1/2 C.
|
3-3/4 C.
|
5 C.
|
6-1/4 C.
|
7-1/2 C.
|
|
Pretzel dip:
|
|
|
|
|
|
|
|
Hot water
|
4 C.
|
|
|
|
|
|
|
Baking soda
|
5 T.
|
|
|
|
|
|
|
Coarse or Kosher salt
|
1 T. +/-
|
|
|
|
|
|
*- 8 T. butter or margarine = 1/2 C. = 1 stick
Assembly Directions:
Pour warm water into a large mixing bowl and add the yeast. Stir 2 or 3 times, until the yeast is wet. When the yeast is dissolved, add the first measure of flour, butter, salt and sugar. Beat for 3 minutes. Add the second measure of flour and knead (by hand or with a dough hook) until the dough isn’t sticky. Place dough in a greased bowl and cover. Allow it to rise until doubled. Punch down the dough, and divide into 12 equal pieces, per recipe made. Grease a baking sheet.
To shape the pretzels, form each piece of dough into an 18” long rope. To do this, put each piece of dough on the counter, and roll it back and forth with your palm, until it’s big enough to use both palms. Put your palms beside each other, on the center of the rope, rolling the dough and at the same time moving your palms away from each other, towards the ends of the rope. When the rope is the appropriate size, grab an end in each hand and pick the rope up off the counter. Touch the center of the dough U to the counter close to you, stretching the ends out vertical from you, so it’s in a large U shape. Take the ends, and cross them over each other to make an X, 2” to 3” from the ends. Take the ends and cross them again, and then pull the double X towards you, by the ends. Stick the ends to the bottom of the U, 2” to 3” apart. Pick up the pretzel by grabbing the dough where the ends connect to the bottom of the U with both hands, and placing it on the greased baking sheet. If necessary, shape the pretzel with your fingers so there is some open space between the curved sides and the double X in the middle. Continue shaping the rest of the dough pieces the same way. Let pretzels rise until doubled.
Preheat oven to 475 degrees. Put the hot water in a deep plastic or glass bowl. Don’t use aluminum. Add the baking soda, and stir until it’s dissolved. If the baking soda doesn’t get dissolved, it will make your pretzels a splotchy brown color. Pick up a pretzel by grabbing the bottom where the ends are attached between the thumb and index finger of each hand. Dunk the pretzel into the water/baking soda solution, and back out again. Let the excess water drain off for 5-8 seconds. The pretzel may stretch a little as it’s draining, and you may need to “catch” the top with your pinkies so it doesn’t stretch back into the water. Put the pretzel back on the baking sheet, shaping it if needed, to allow space between the sides and middle. Dunk all of the other pretzels as you did the first one. When all the pretzels are back on the baking sheet, sprinkle with the coarse/Kosher salt to taste. Bake until browned, 10-12 minutes. Remove pretzels from the baking sheet to a wire rack to cool. Cooling on the wire rack will prevent them from getting soggy.
Freezing Directions:
Put each cooled pretzel into a fold-top baggie. Put all the baggies in a one-gallon freezer bag. Seal, label and freeze.
Serving Directions:
Remove the desired number of pretzels from the freezer. Open the baggie and heat in the microwave for 10 seconds or until warm.
Tammy’s Comments:
What a great snack to have on hand! Don’t let the directions about shaping and dunking the pretzels put you off… it really isn’t that difficult. Once you do one or two and get the hang of it, it’s pretty easy. Most pretzel recipes I looked at said “ twist into desired shape”. Which is all well and good, until you’re standing there with the dough in your hands and can’t make it look like a pretzel if your life depended on it! It took me a bit to get it down, and I figured detailed directions were much better than vague ones! If you’re a visual person, check out the March 2004 issue of our newsletter online for some pictures I took while making my pretzels.

